NetSuite Connection Guide
How to connect NetSuite to my WorldFirst account
Step 1 Login to Netsuite
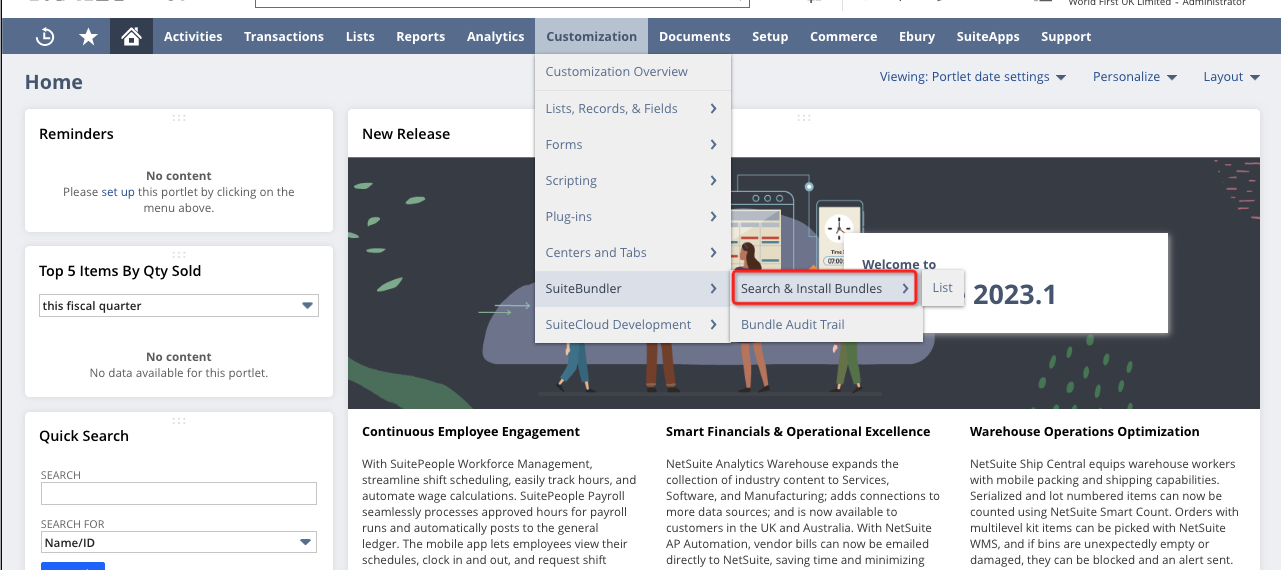
Login to Netsuite, navigate to Customization > SuiteBundler > Search & Install Bundles, and install the WorldFirst bundle using the following instructions.

Note:
- The user logging into Netsuite to install the WorldFirst bundle must have Admin permissions on the Netsuite account, as only Admins are permitted to install bundles on Netsuite.
- The admin user on the Netsuite account must also be an Admin user on the WorldFirst Account which is being connected to Netsuite.
Step 2 Enabling REST Web Services and Token-Based Authentication
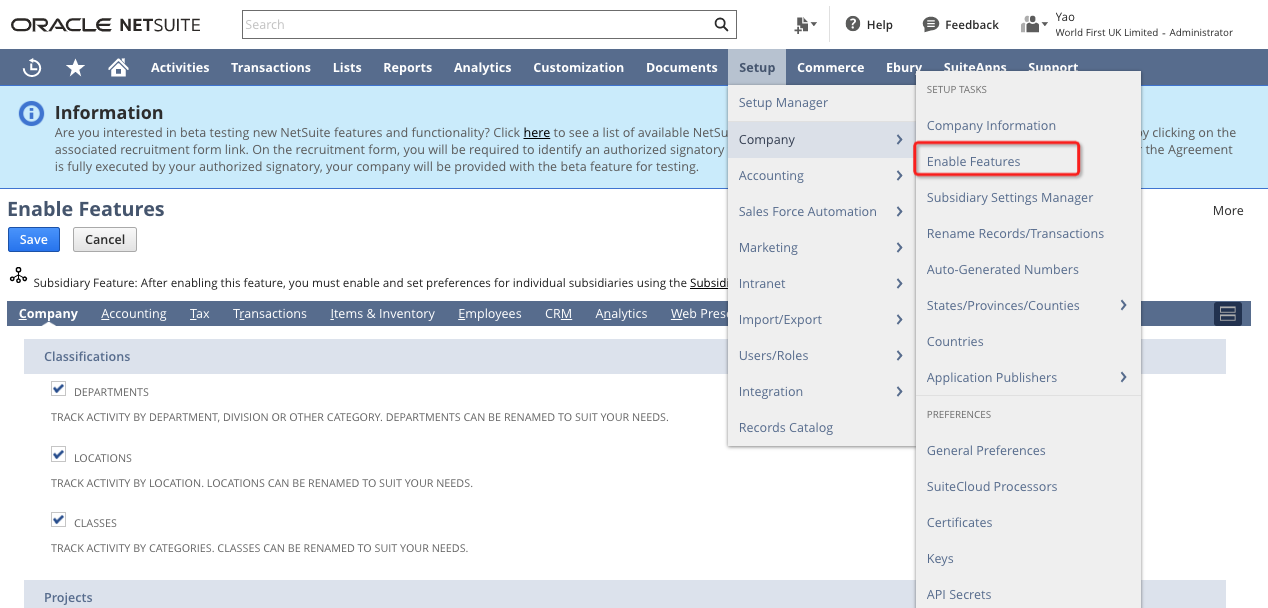
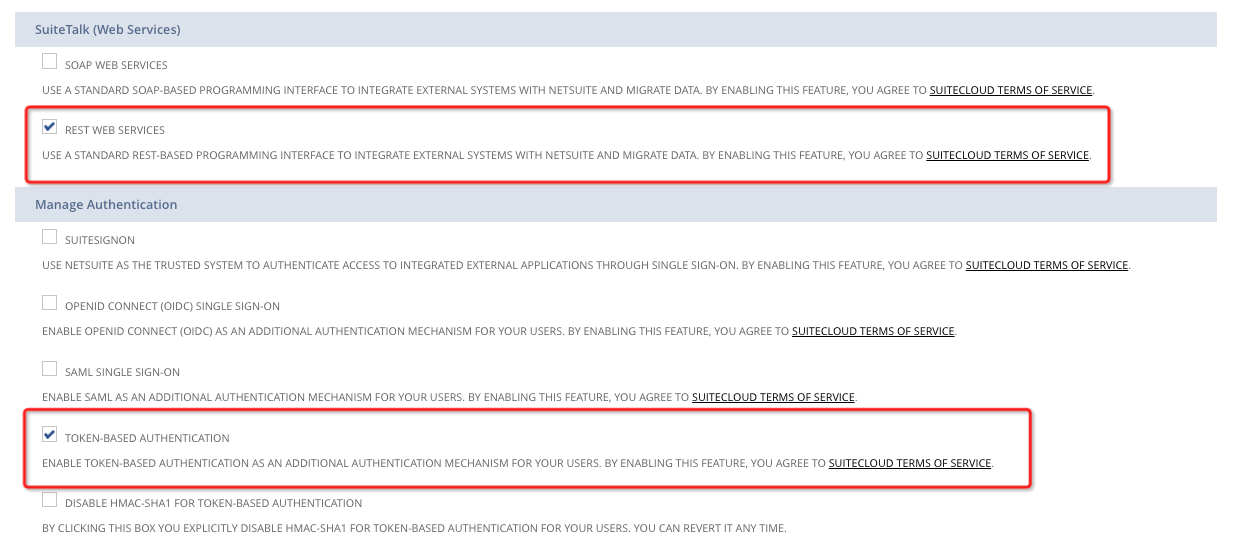
- Navigate to Setup > Company > Enable Features
- Under the SuiteCloud tab, look for REST Web Services and Token - Based Authentication
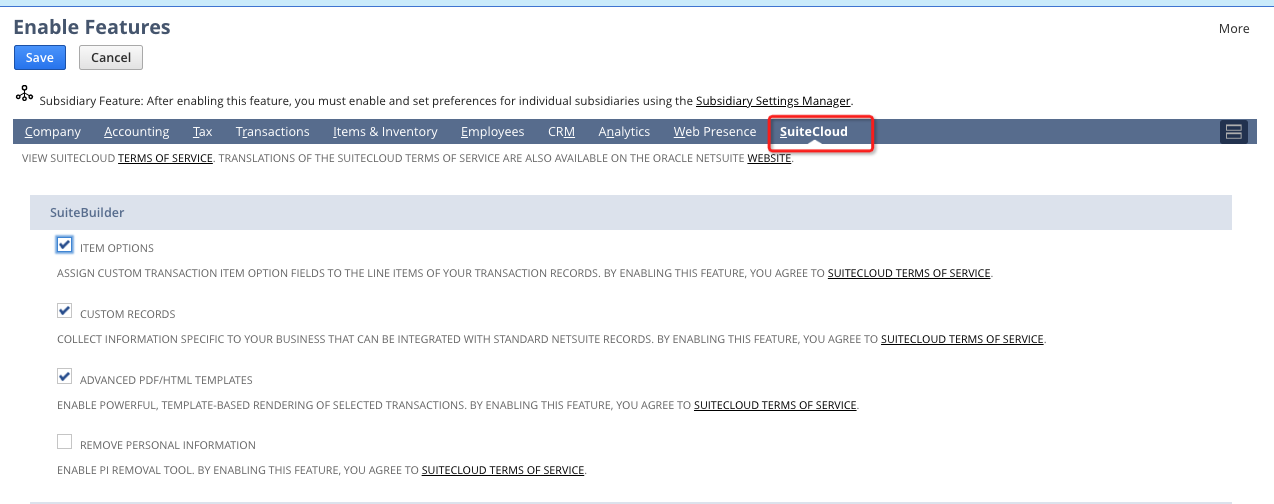
- Make sure both are checked and save
Step 3 Generating your Consumer Key and Consumer Secret
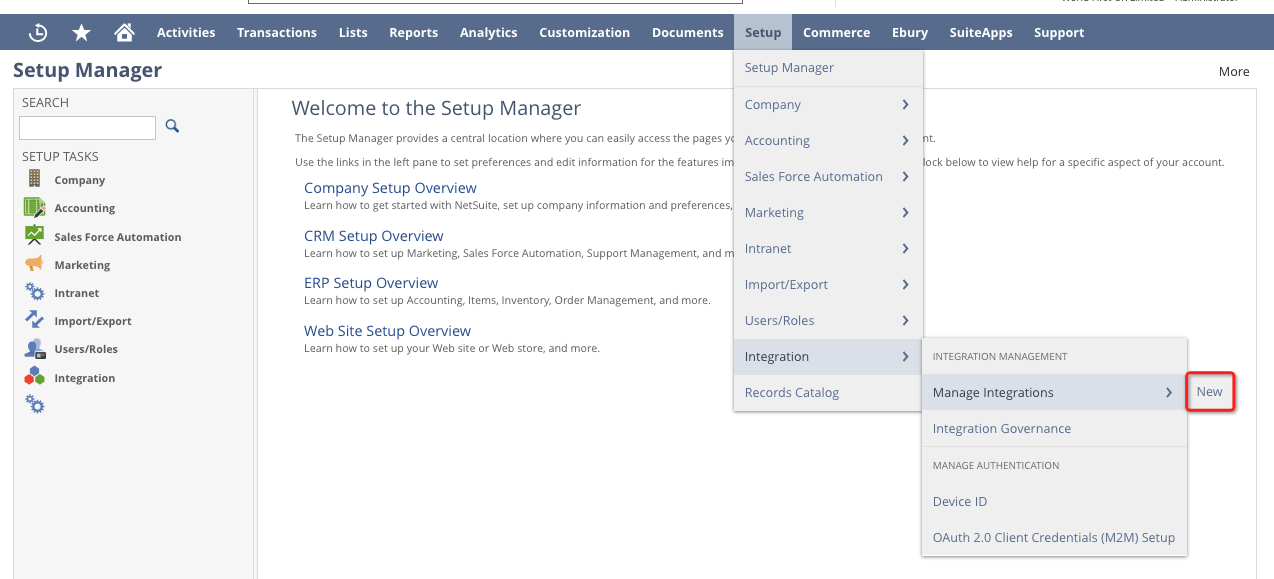
- Navigate to Setup > Integration > Manage Integrations > New
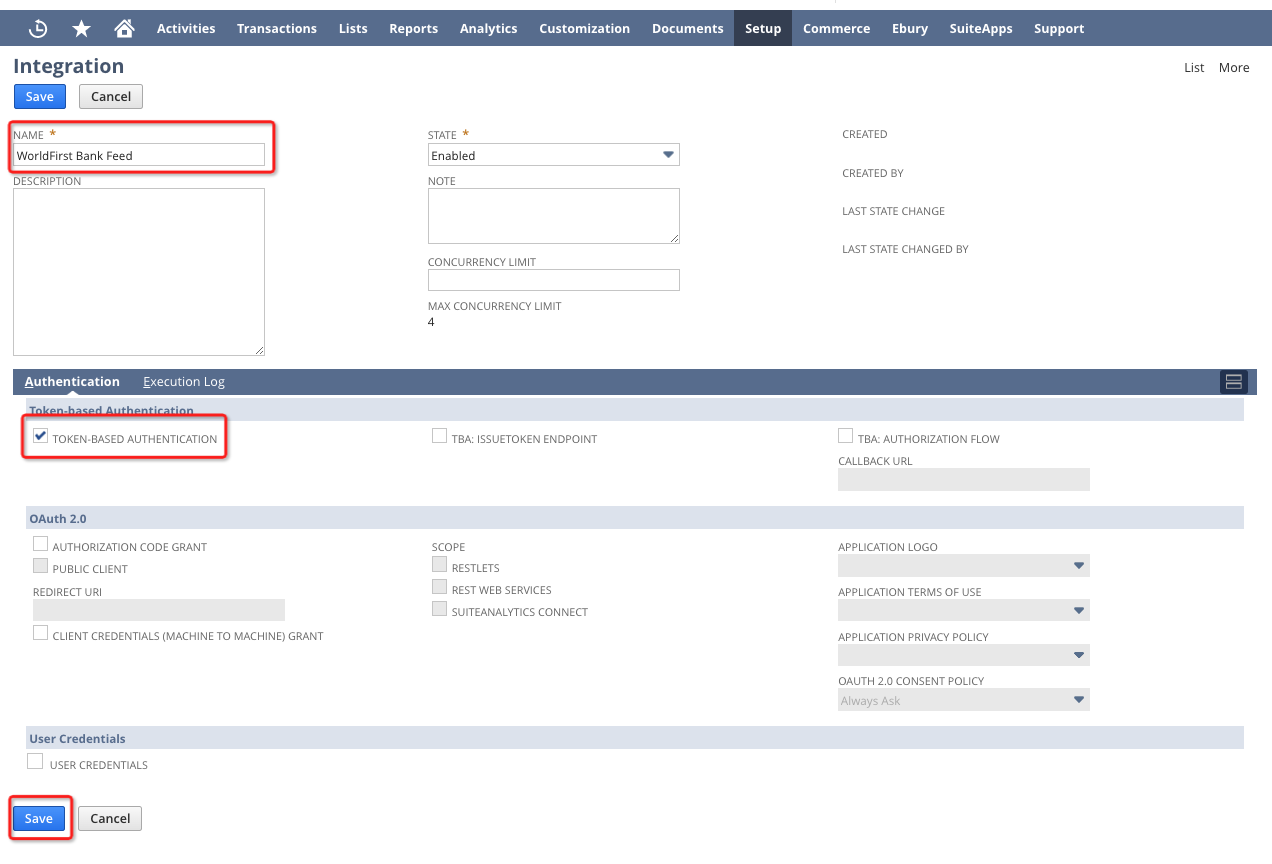
- Fill in the name as you wish and check 'Token-Based Authentication'
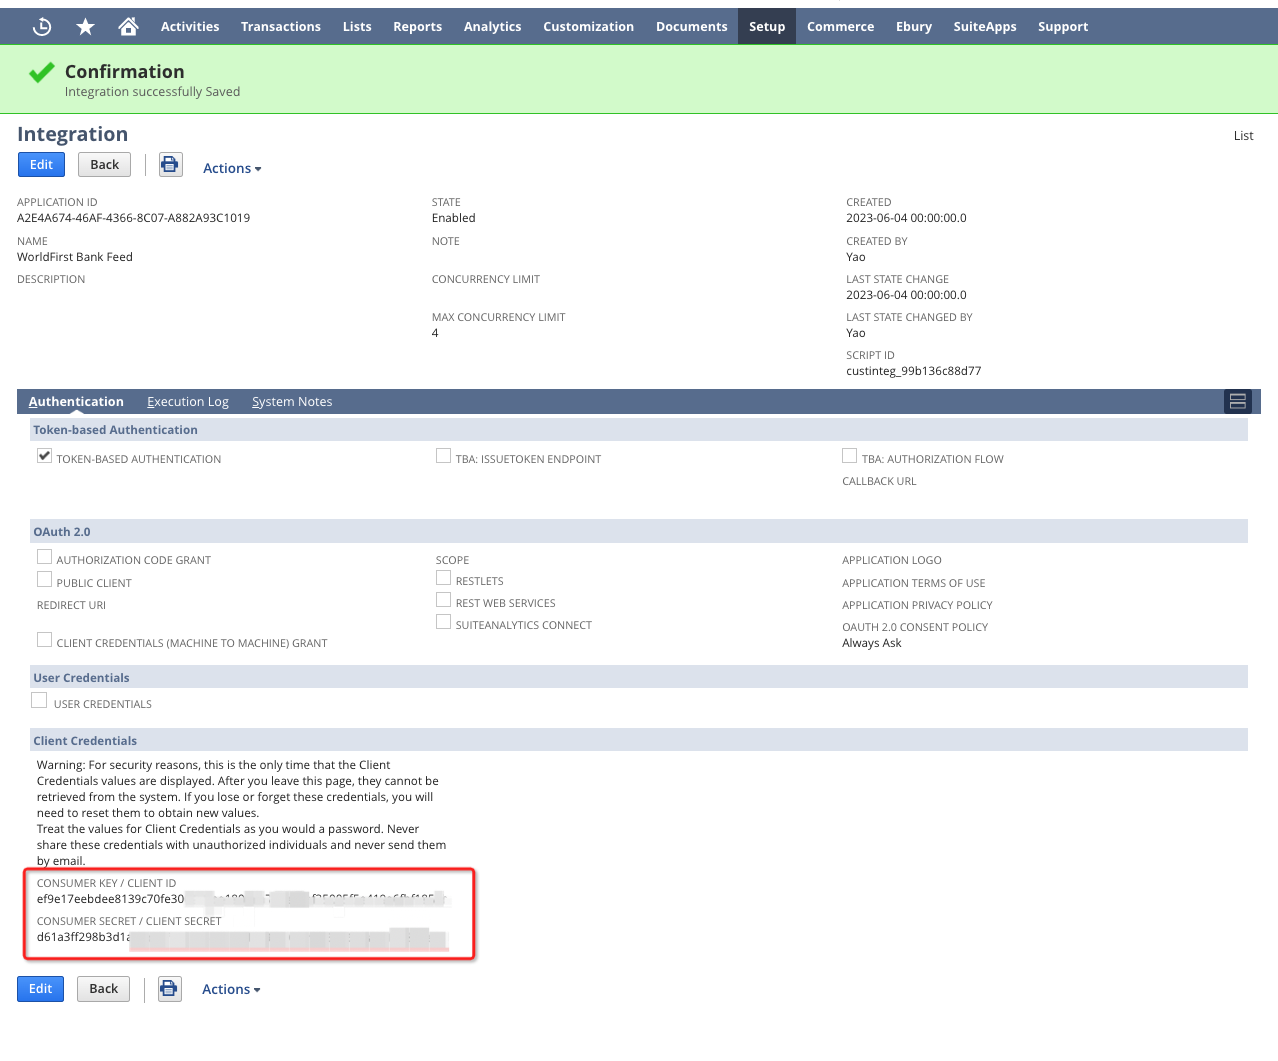
- Click 'Save' and your consumer key and secret will be displayed. Please save this information in a password protected document
Step 4 Generating your Token ID and Secret
- Navigate to Setup > Users/Roles > Access Tokens > New
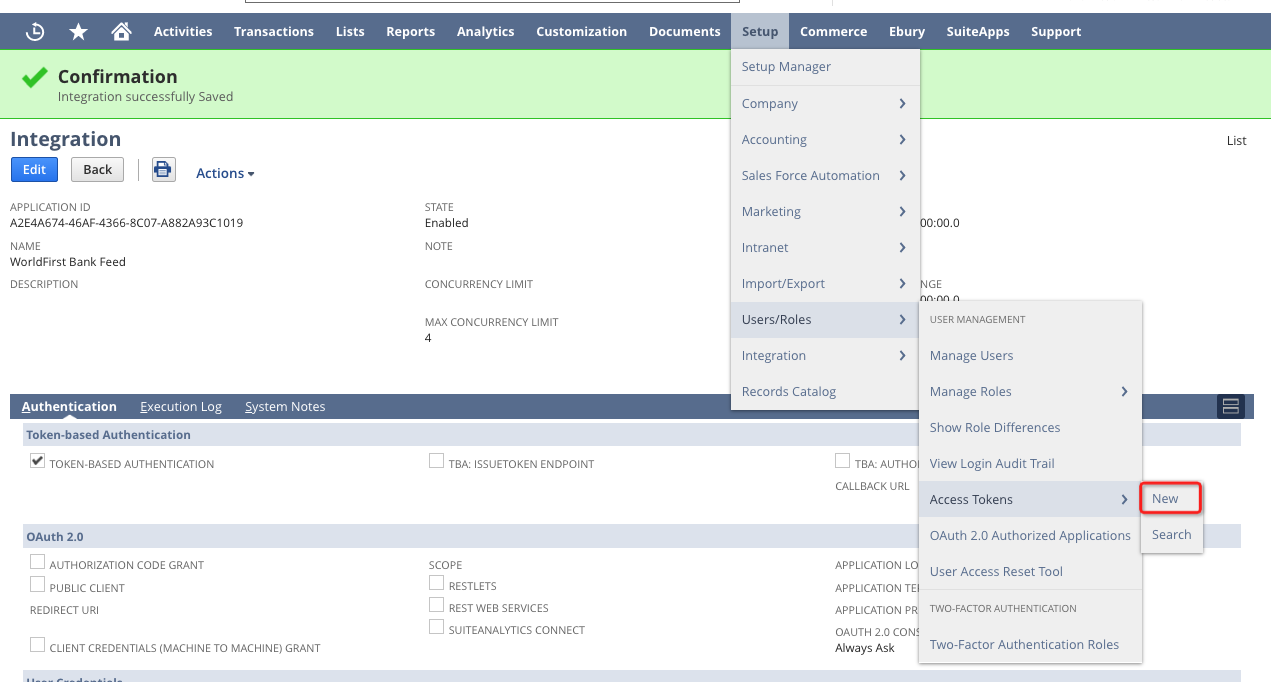
- Enter the following information.
- Application name: choose the application created in the previous step
- User: select an user, note that the user must be associated with role "WorldFirst Administrator"
- Role: select "WorldFirst Administrator"
- Token name: keep as it is

- Once saved, the Token ID and Secret will be displayed.
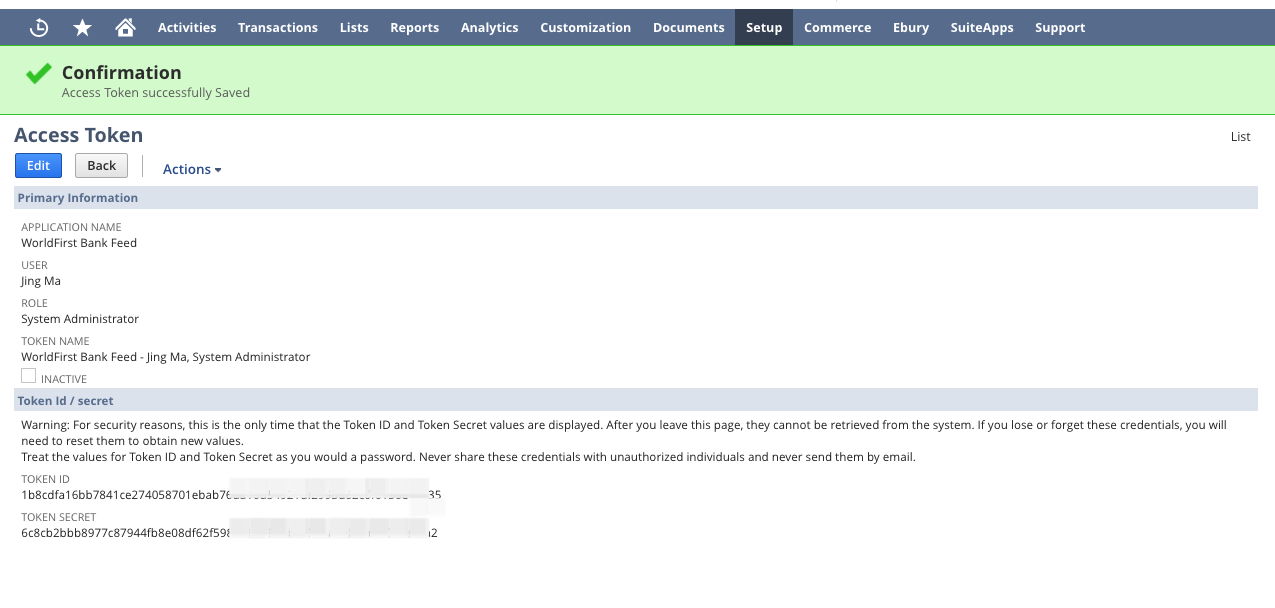
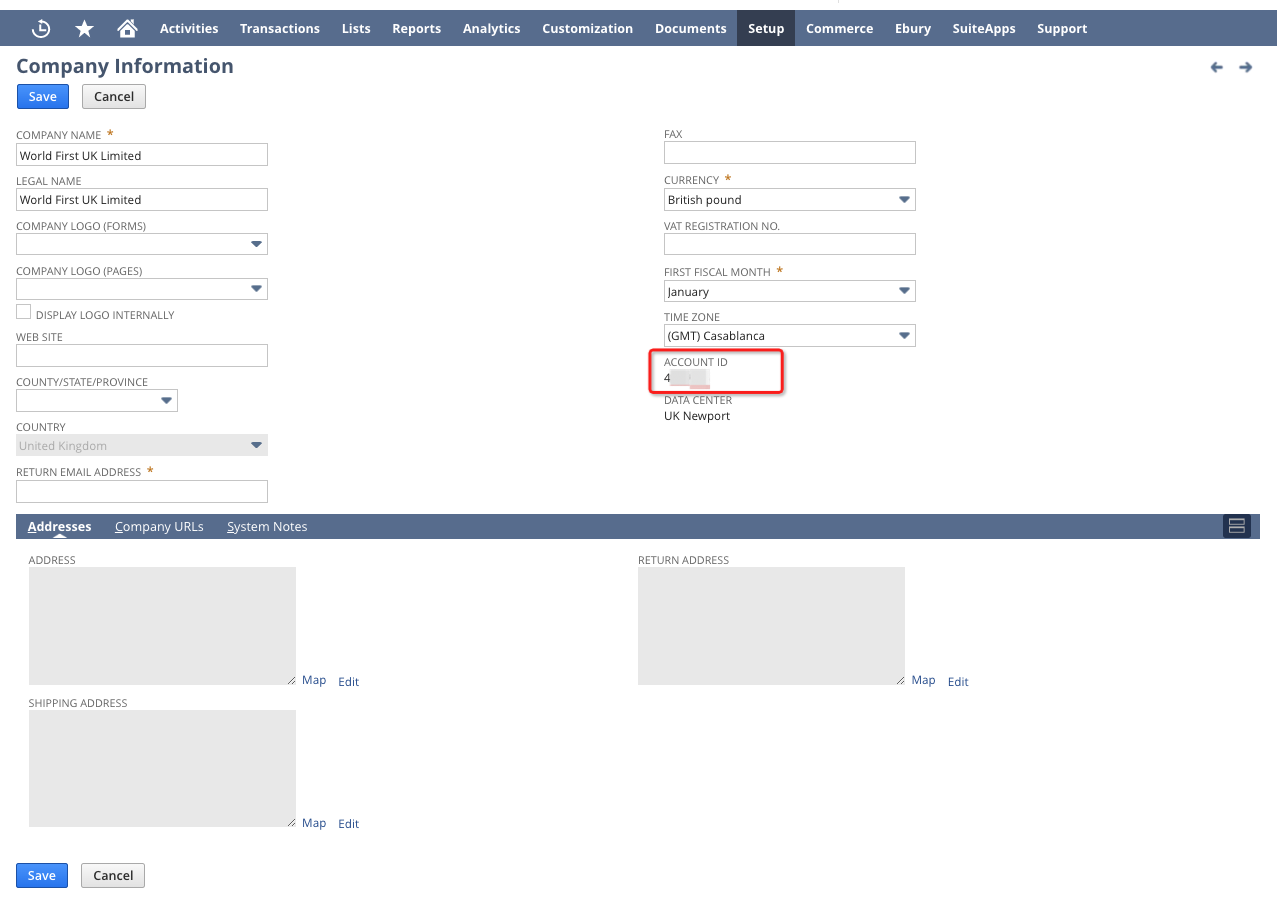
Step 5 Finding your Account ID
- Go to Setup > Company > Company Information > Company URLS
Step 6 Login to WF, and set up your Netsuite integraiton
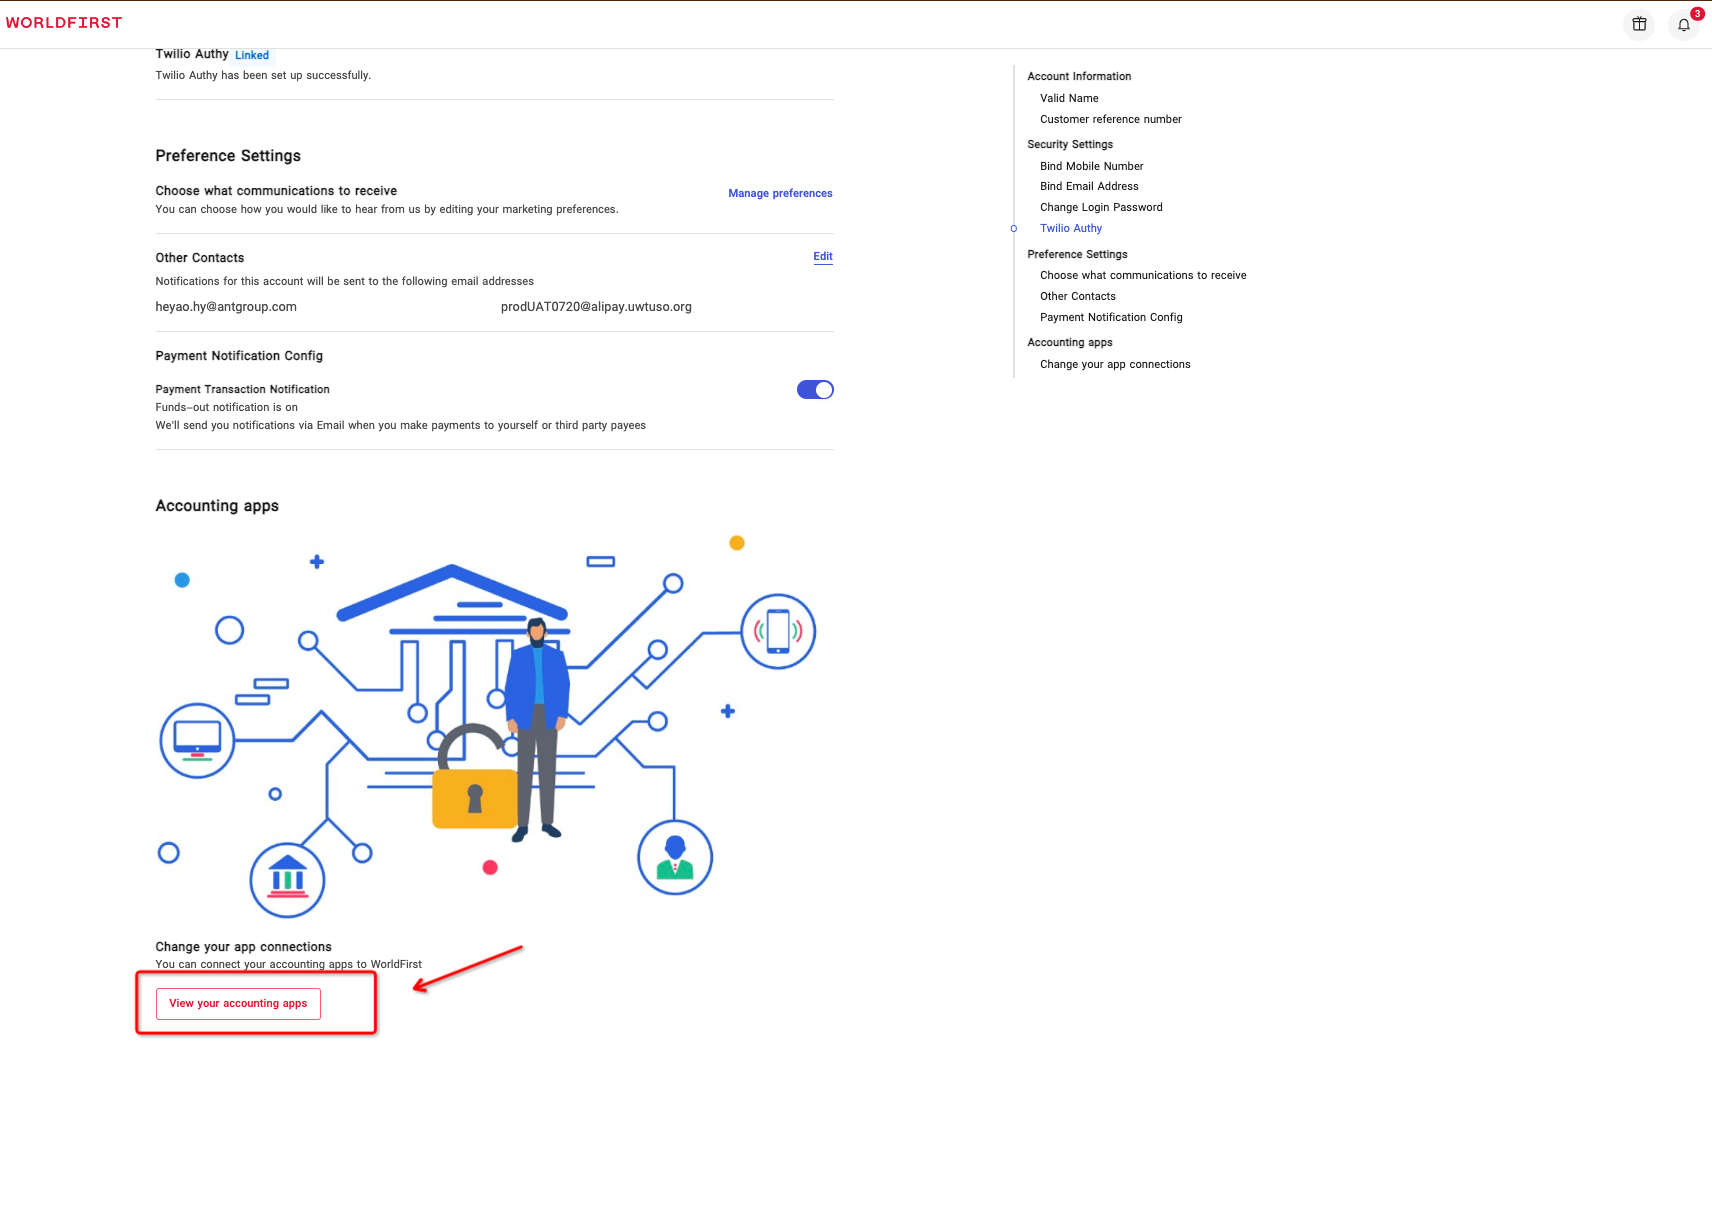
- Navigate to My Account and scroll down to the bottom of the page
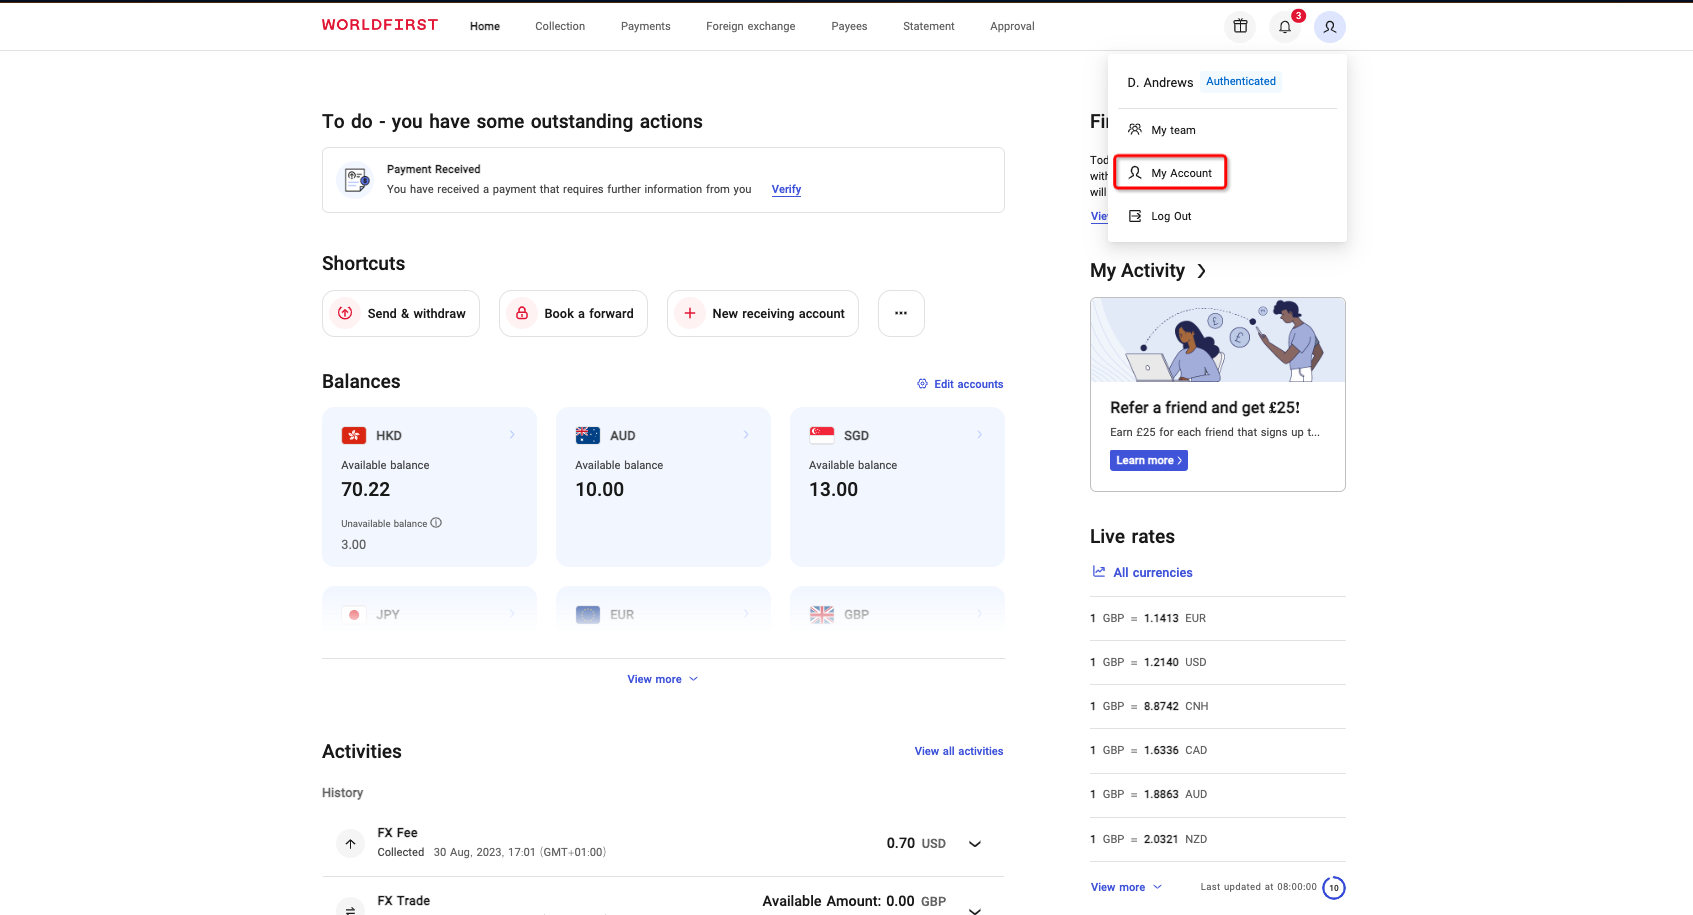
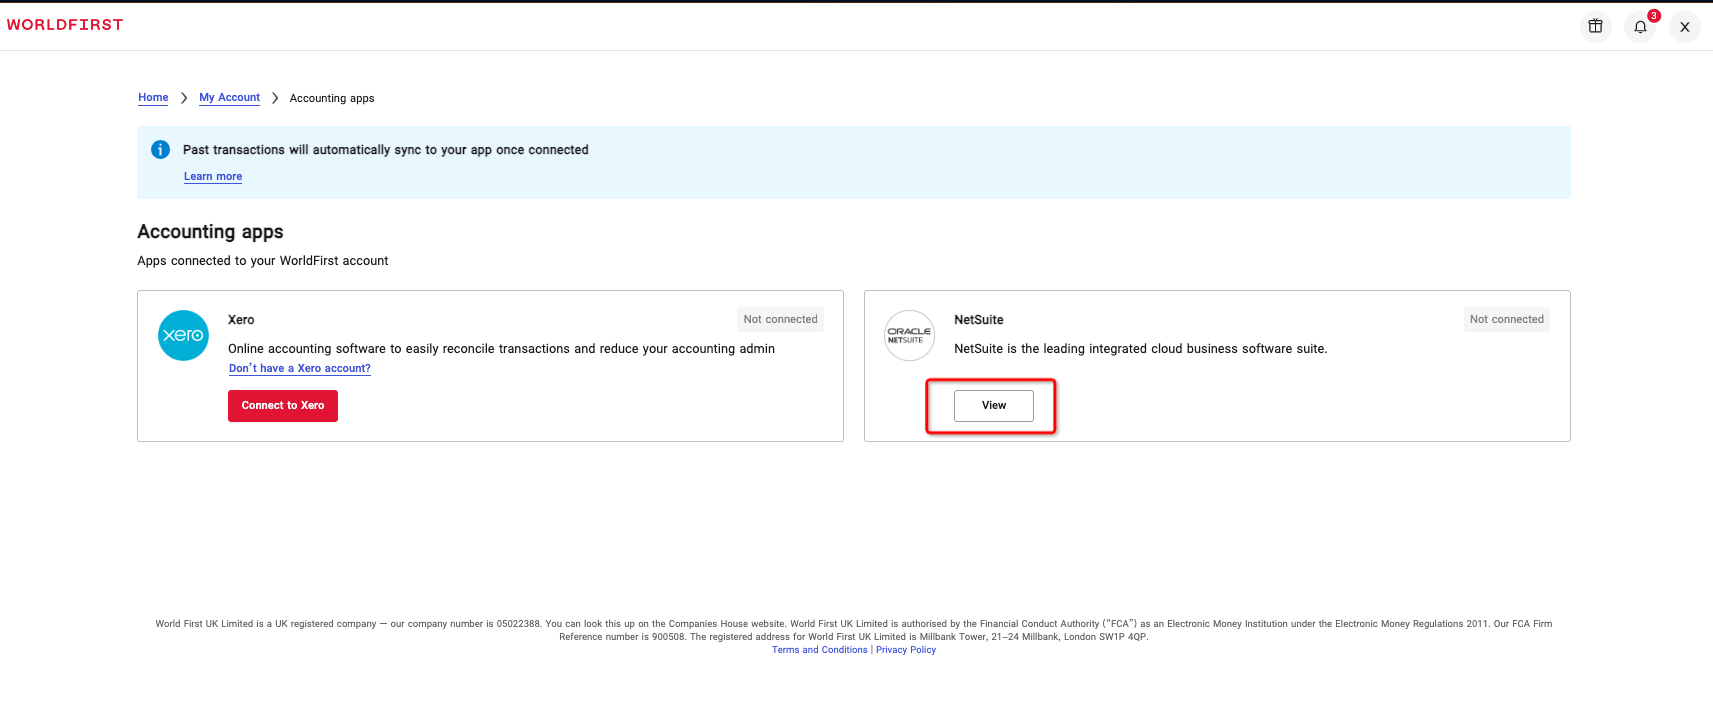
- Navigate to Accounting Apps > Netsuite
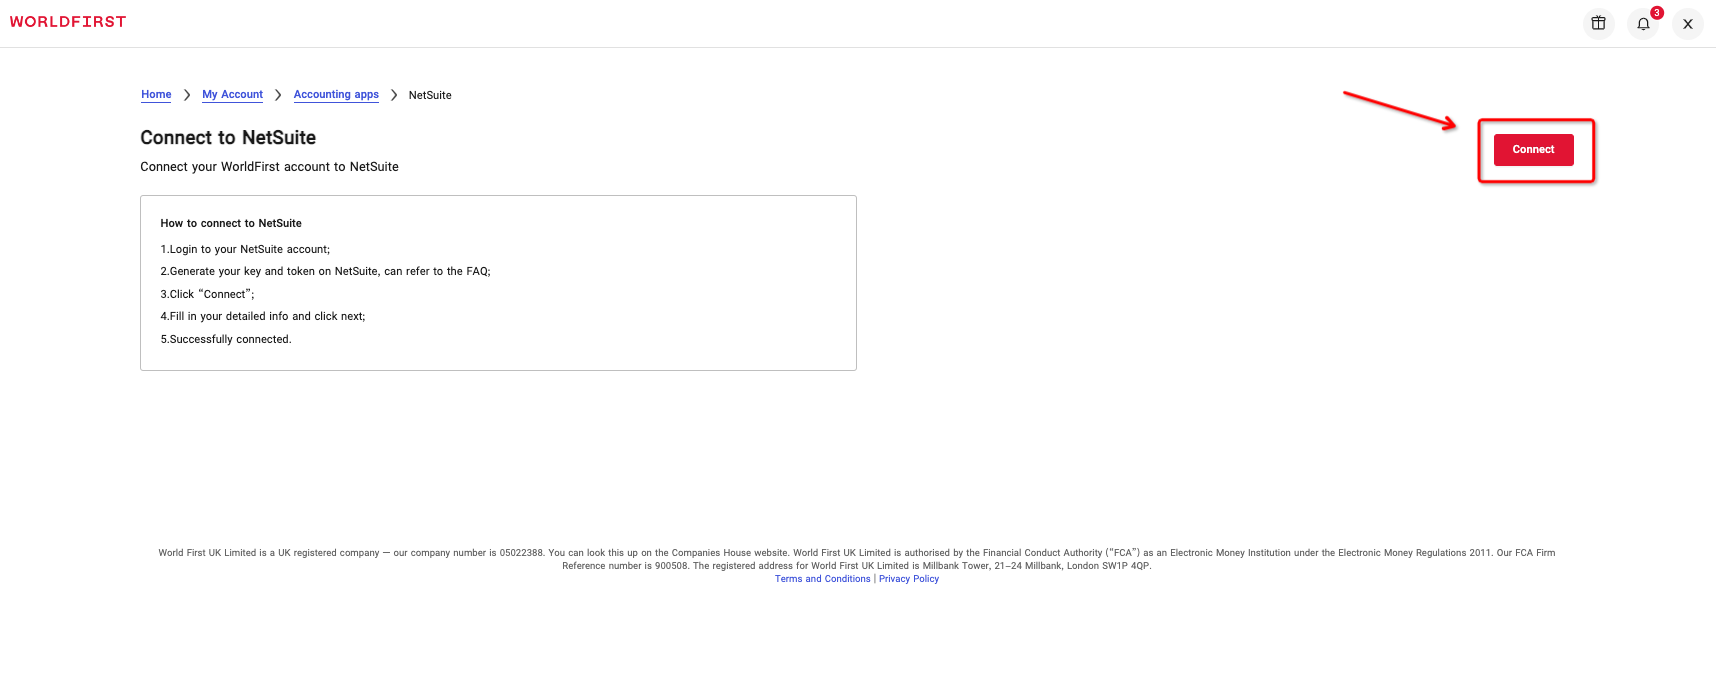
- Click View to enter, then click Connect
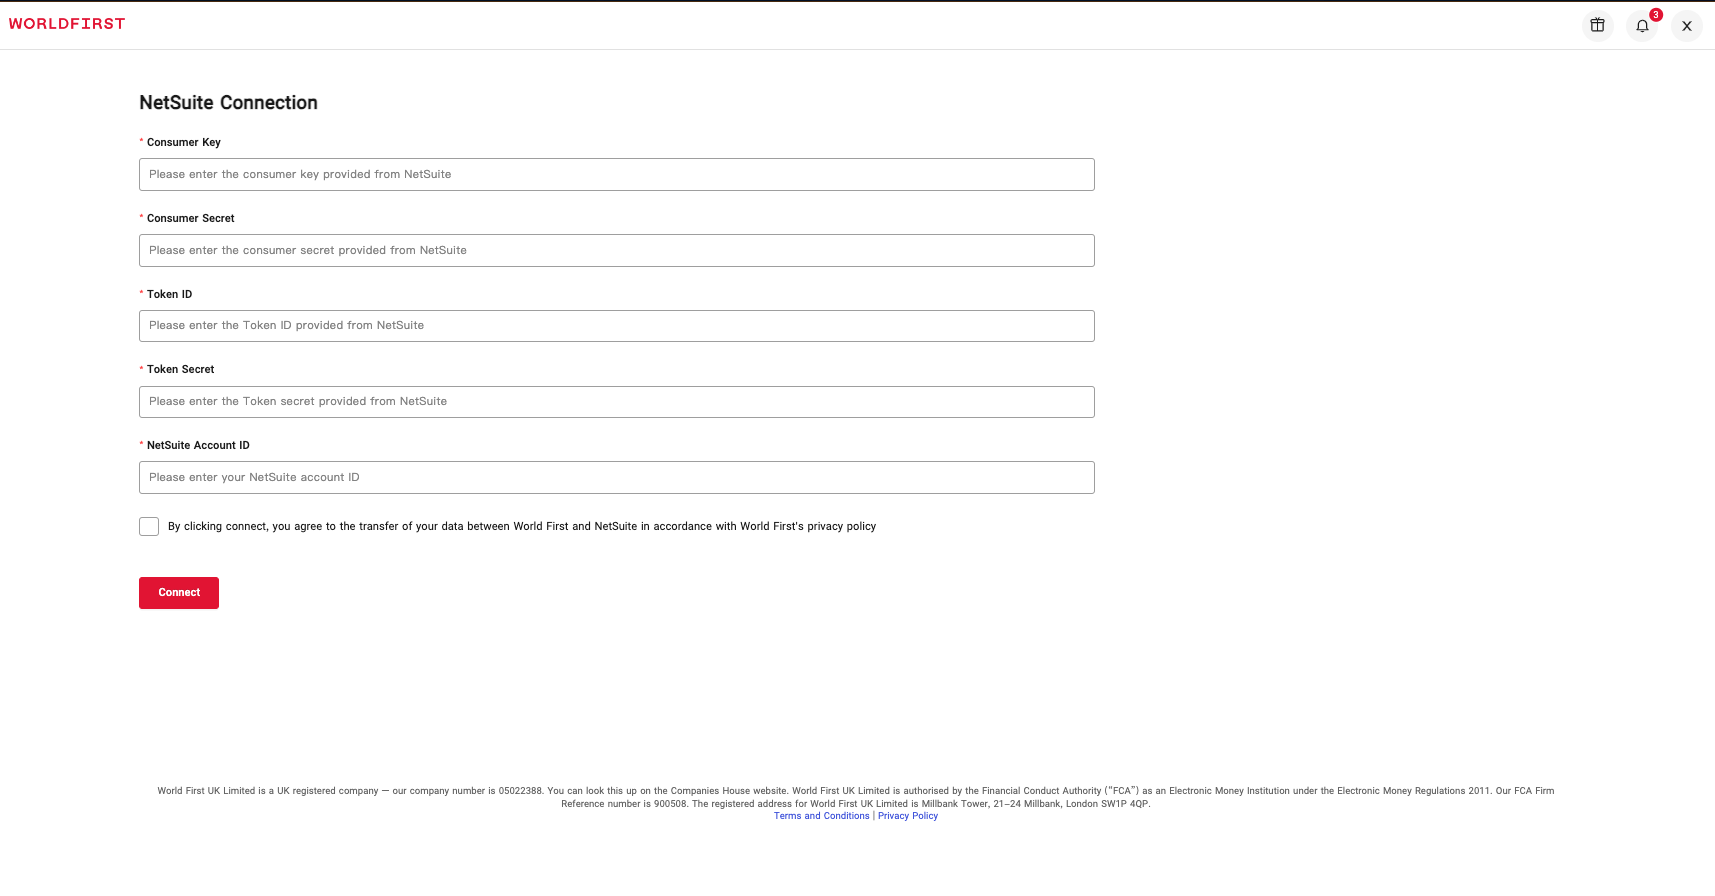
- Fill in your Consumer Key, Consumer Secret, Token ID , Secret and Account ID, tick the disclaimer and click Connect
Step 7 Add a new Financial Institution
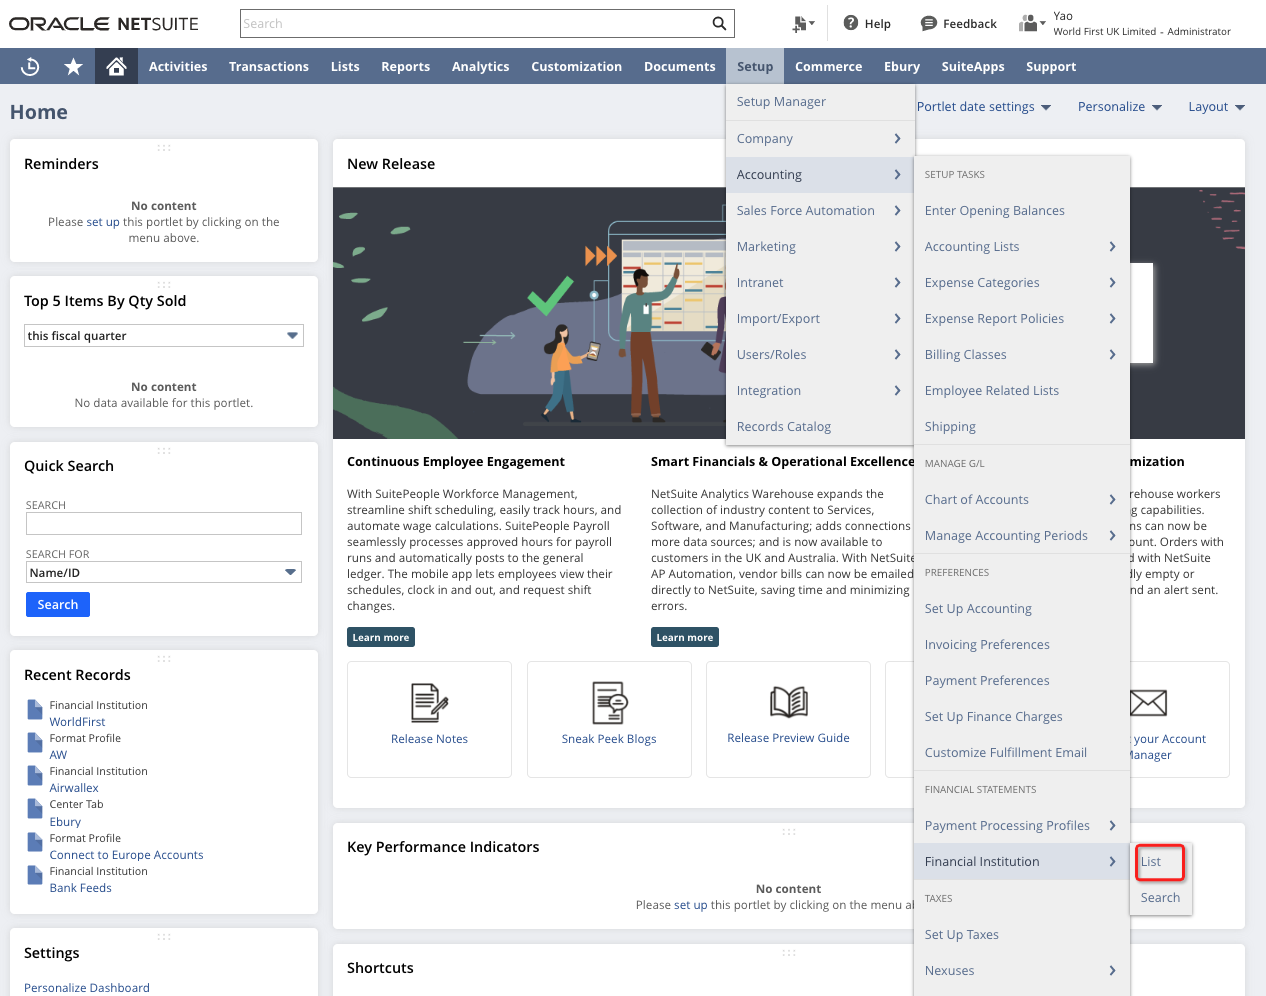
- Navigate to Setup > Accounting > Financial Institution > List > New Financial Institution

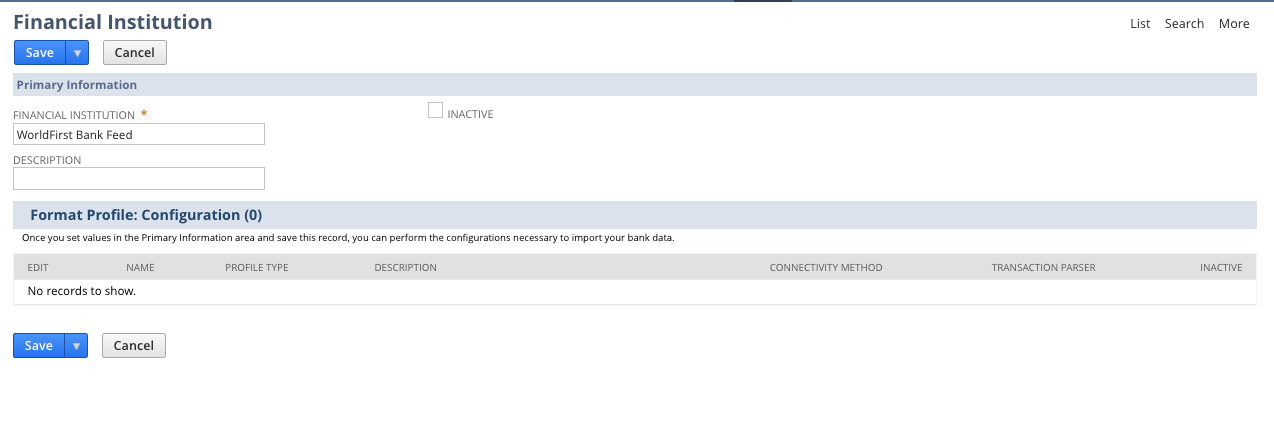
- Fill in the name, and click 'Save'
Step 8 Financial Institution Setup
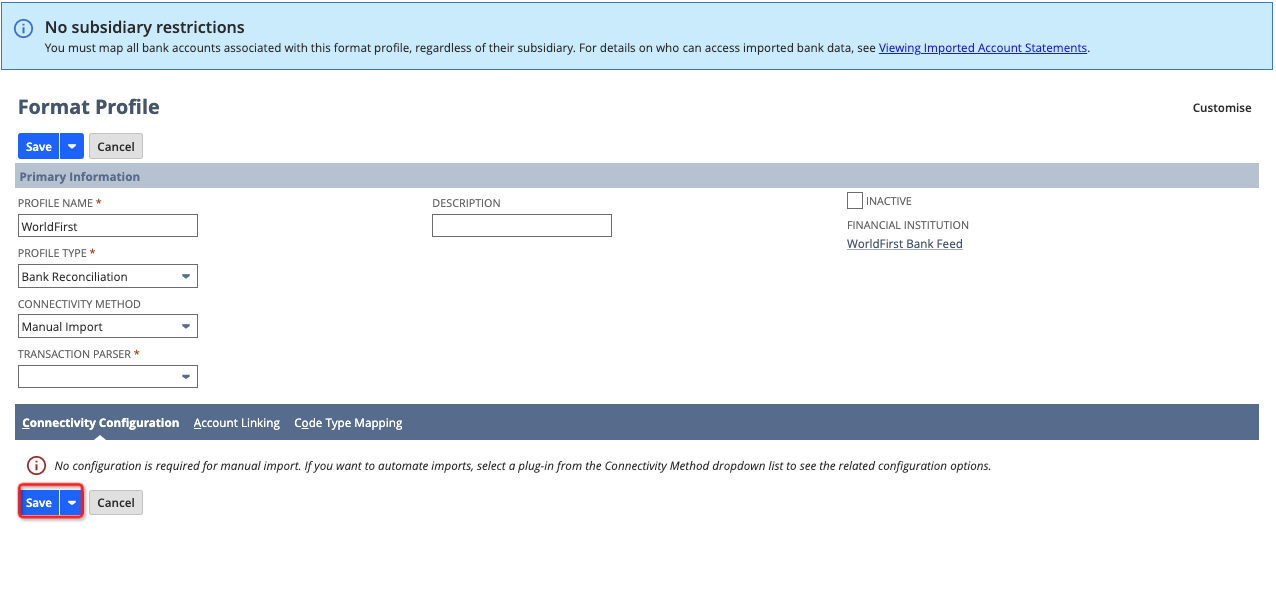
- Go to the Format Profile Configuration sub-tab and click Add
- Input the following mandatory values to finish the mapping from you WF account against the Netsuite account
- Profile Name: enter your preferred profile name
- Profile Type: Bank Reconciliation
- Connectivity Method: WorldFirst Bank Feed
- Transaction Parser: WorldFirst Parser
- Click 'Save'
Step 9 Map your Netsuite bank account to your WF currency account
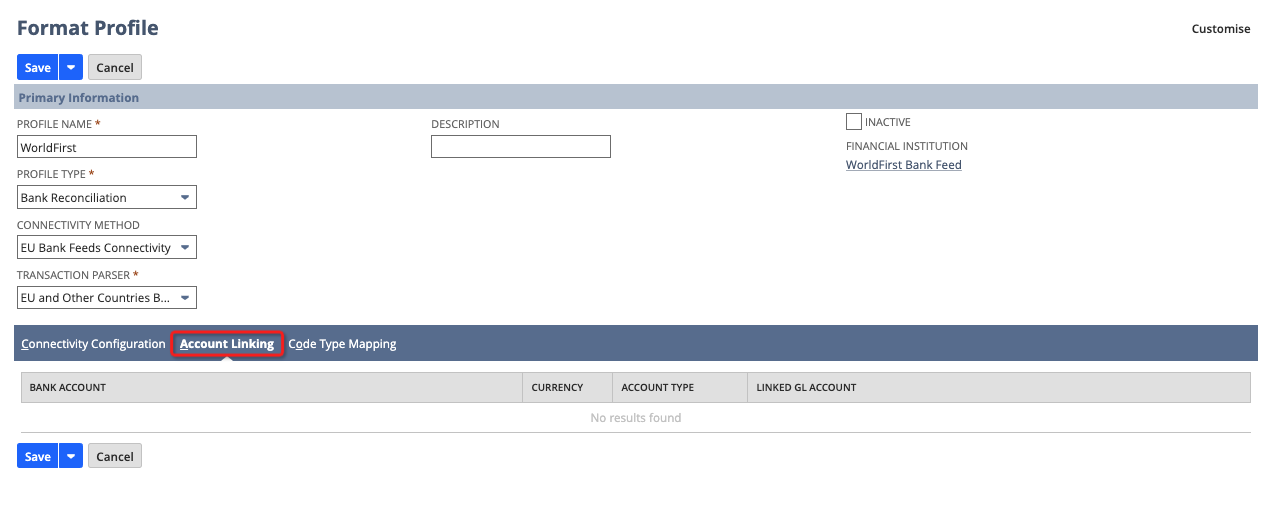
- Under Format Profile, go to the sub-tab Account Linking.
- Once your connection is ready, you will be able to complete the account mapping here.
Step 10 Match your bank feed data
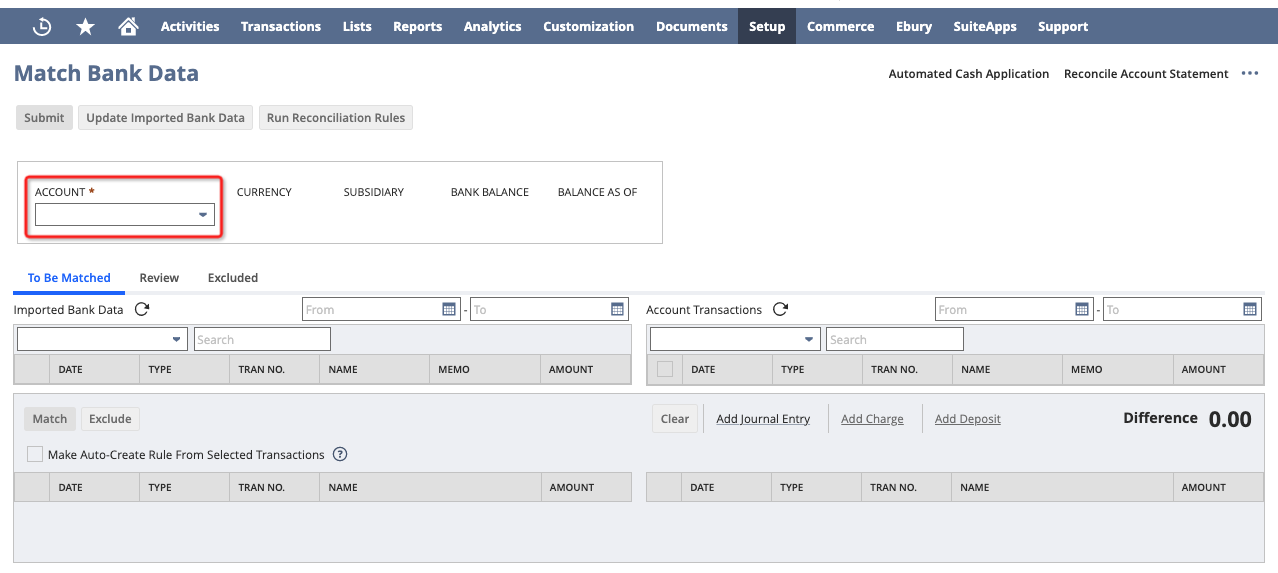
- Navigate to Transactions > Bank > Match Bank Data
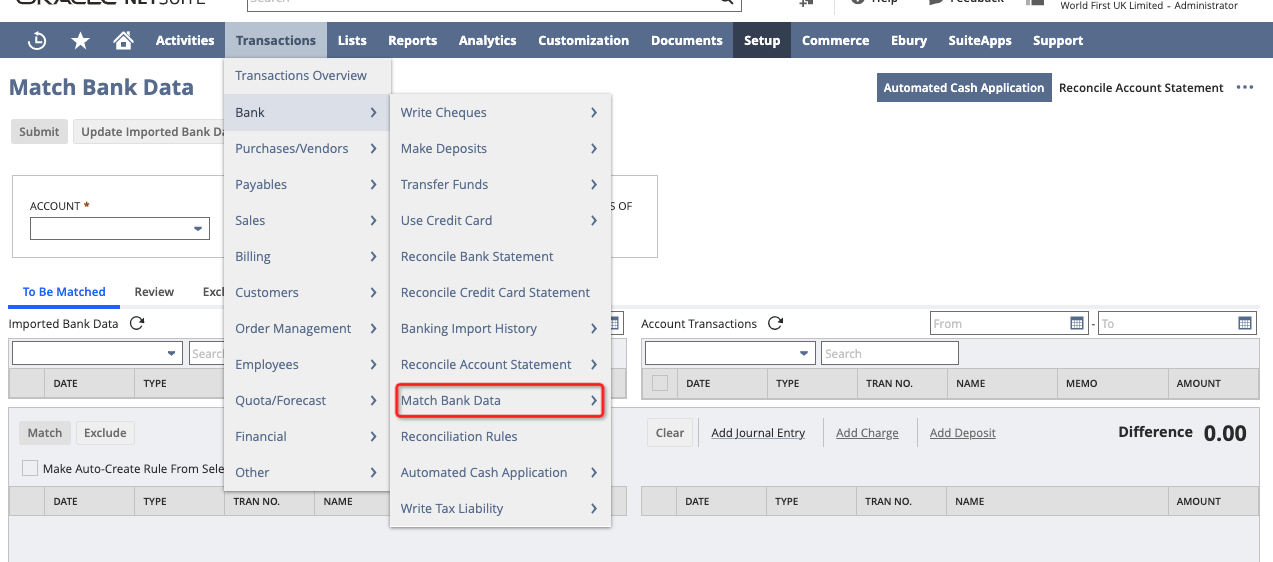
- Select the corresponding Netsuite and WorldFirst accounts to match.
